> For the complete documentation index, see [llms.txt](https://upchatty.gitbook.io/upchatty-documentation/llms.txt). Markdown versions of documentation pages are available by appending `.md` to page URLs; this page is available as [Markdown](https://upchatty.gitbook.io/upchatty-documentation/getting-started/creating-a-chatbot.md).
# Creating a chatbot
#### Step-by-Step Guide to Create a Chatbot
**Step 1: Log in to UpChatty**
* Open your web browser and navigate to the UpChatty website.
* Log in using your credentials.
**Step 2: Navigate to the Dashboard**
* Once logged in, you will be taken to the dashboard. It should look like the following:
* Click on the "Create Chatbot" button.
**Step 3: Start the Chatbot Creation Process**
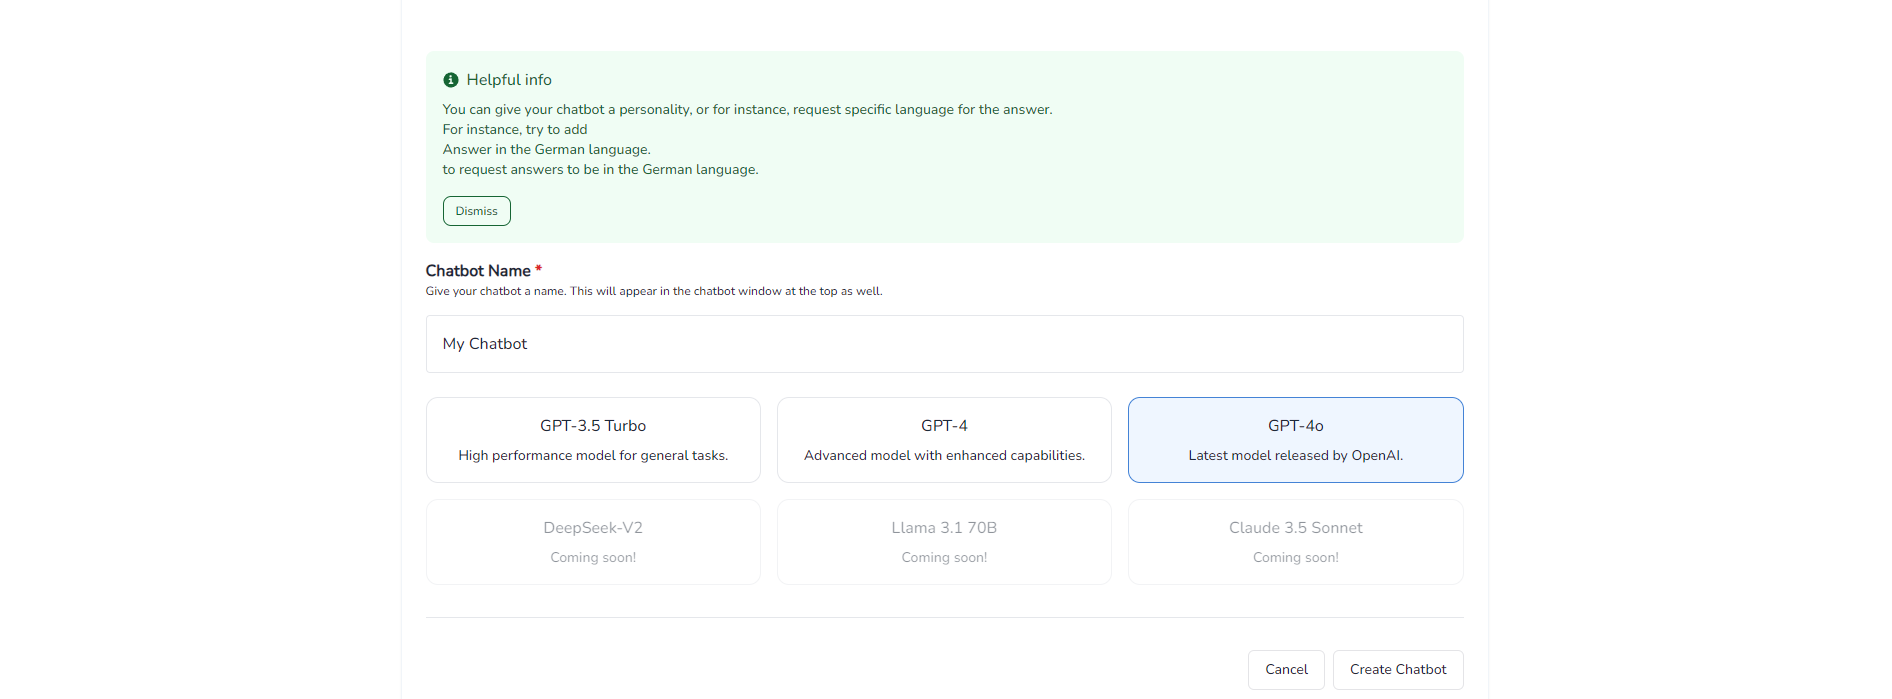
* After clicking "Create Chatbot", you will be directed to a new page where you can set up your chatbot.
**Step 4: Provide Chatbot Details**
* **Chatbot Name:** Enter a name for your chatbot in the "Chatbot Name" field.
* **Model Selection:** Select the AI model you want to use for your chatbot. You have options such as GPT-3.5 Turbo, GPT-4, and GPT-4o.
* For this tutorial, we will select "GPT-4o" (the latest model).
**Step 5: Finalize and Create the Chatbot**
* Once you have entered the chatbot name and selected the model, click on the "Create Chatbot" button at the bottom right of the page.
**Step 6: Confirmation**
* After clicking "Create Chatbot", you will be redirected to the dashboard where you can see your newly created chatbot.
* Here, you can see the name, model, and temperature settings of your chatbot.